I recently finished a small home ADS-B radar project and put the live map online at samnet.dev/radar. The goal was simple: capture aircraft broadcasts over the air, decode them locally using dump1090-fa, and serve a clean, fast UI showing live traffic around Dallas-Fort Worth. This post explains what I built, the physical and network choices I made, and the lessons I learned along the way.
Overview of the System
This is a local-first system. I wanted to ensure that the data processing happened entirely within my own network, with only the necessary information exposed to the public. The architecture is split between a lightweight capture device and a more robust application server.
- Radio Front End: An RTL-SDR dongle listens to ADS-B signals on 1090 MHz.
- Decoder: A Raspberry Pi Zero 2 sits next to the dongle and decodes the raw RF into aircraft messages.
- Server: A Raspberry Pi 4 runs the public-facing site, Nginx reverse proxy, and analytics.
- Frontend: The UI reads a local JSON feed to visualize aircraft positions, altitude, speed, and heading in real time using tar1090.
The Physical Build
I focused heavily on the physical setup because reception quality directly determines how useful the map is. If the antenna can't hear the plane, the software can't map it.
Hardware Choices
- RTL-SDR USB Dongle: Low cost and works surprisingly well for 1090 MHz ADS-B.
- Raspberry Pi Zero 2: This runs the decoder. It is compact and low-power, making it ideal for a "headless" radio front end tucked away near the antenna.
- Raspberry Pi 4: This acts as the heavy lifter for web serving and the reverse proxy.
- Antenna: A tuned 1090 MHz antenna with a clear line of sight improves reception dramatically. I used an elevated, outdoor mount for best results.
Note: Keeping RF losses low between the antenna and the dongle matters more than many people expect. I used LMR-240 low-loss coax and quality SMA adapters to ensure the signal stayed strong over the short run.
I also paid attention to the enclosure and grounding. Weatherproofing the outdoor components and using proper grounding reduced the noise floor significantly, improving both range and uptime. The enclosure is IP67 rated, keeping the Pi Zero dry even during severe storms.
Technical Details
I kept the software stack lean. The Pi Zero 2 runs a decoder (specifically dump1090-fa) to convert RF signals into a JSON stream. The Pi 4 consumes this stream via a simple HTTP fetch.
The difference between dump1090 and tar1090
It's important to clarify the roles of the software here, as I use both:
- dump1090 (Backend): This is the decoder engine. It talks directly to the USB radio dongle, performs the demodulation of the raw 1090 MHz signal, and error-corrects the messages. It outputs raw data.
- tar1090 (Frontend): This is the web interface. While dump1090 comes with a basic "SkyAware" map,
tar1090is a significantly enhanced interface that sits on top of the decoder. It provides the visual layer you see in the browser.
The Data Flow
The system produces a raw JSON feed available publicly at samnet.dev/radar-data/aircraft.json. This feed drives both the custom UI and the analytics engine. It looks something like this (simplified):
{
  "now": 1698345123.5,
  "aircraft": [
    {
      "hex": "a8291f",
      "flight": "UAL123",
      "alt_baro": 32000,
      "gs": 450,
      "track": 185.4,
      "lat": 32.7767,
      "lon": -96.7970
    }
  ]
}
The Pi 4 serves the UI and runs a reverse proxy. I use a standard Nginx setup with proxy_pass to forward requests to the local UI and to protect the backend while exposing a friendly URL. TLS is terminated at the reverse proxy using a trusted certificate so the site loads securely for visitors.
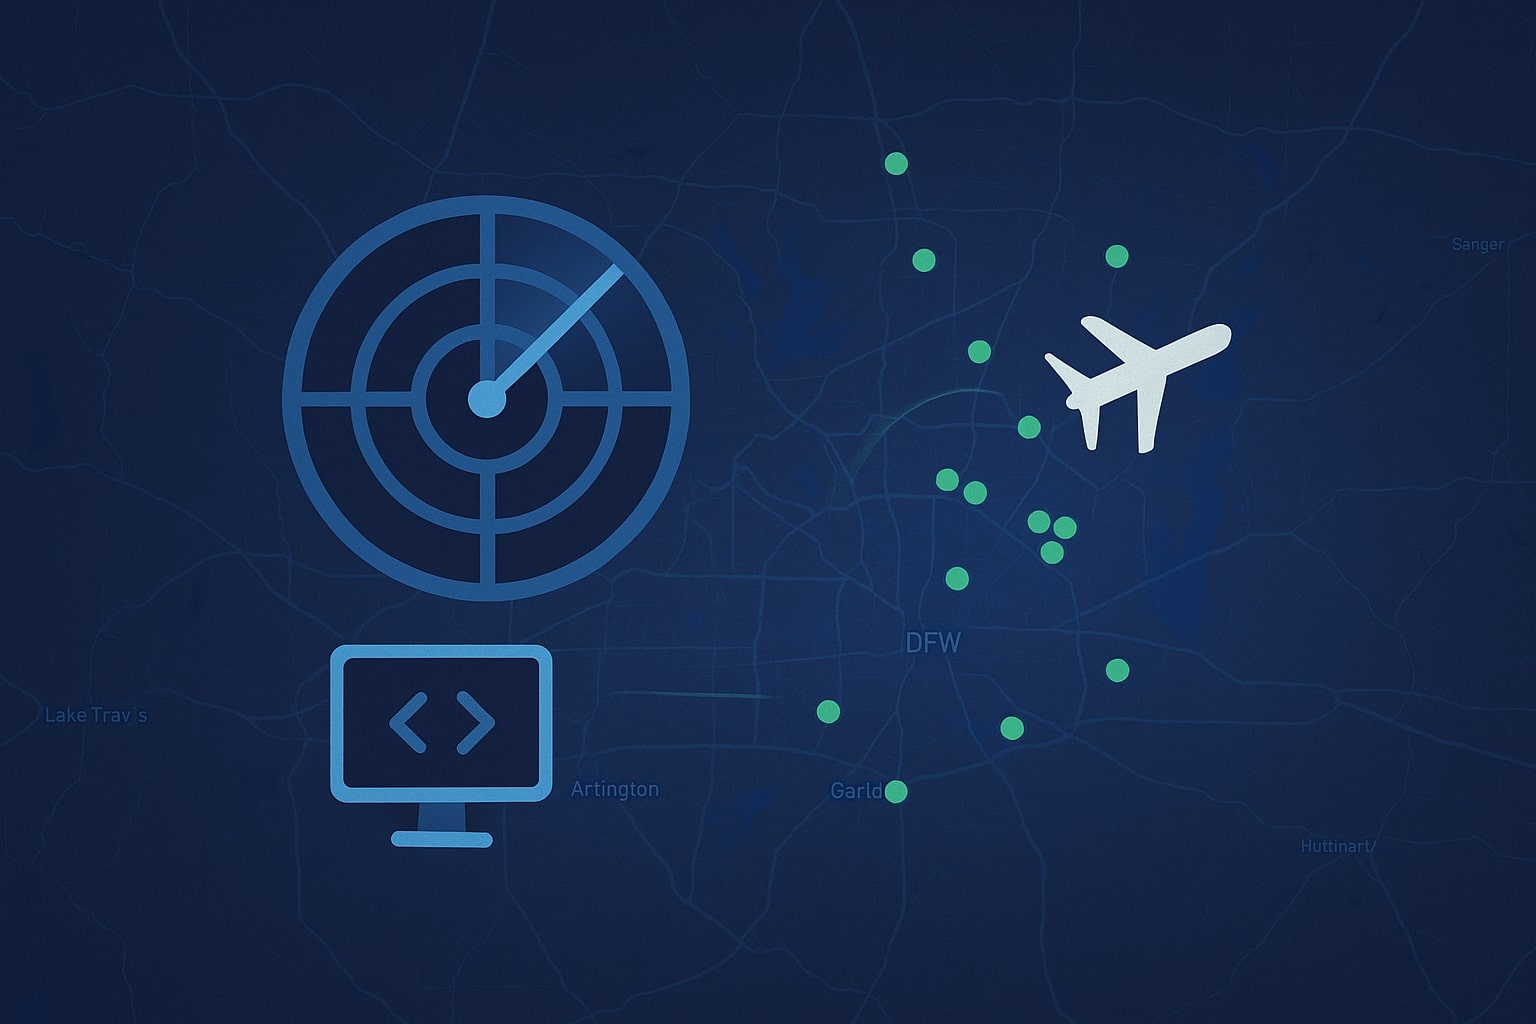
The Custom Dashboard: SamNet Radar
While I initially relied on standard tools, I ultimately built a custom "Customer UI" hosted at samnet.dev/radar to provide a more streamlined experience for general users.
Unlike the dense, technical interface of standard decoder maps, this custom dashboard focuses on "glanceability" and aesthetics:
- Dark Mode First: The map uses a high-contrast dark theme that makes aircraft pop against the background, perfect for keeping on a second monitor.
- Altitude Color Coding: Aircraft icons change color based on their altitude. Orange indicates high-altitude cruisers (30,000ft+), while blue and green signify aircraft on approach or landing. This gives you an instant 3D understanding of the airspace.
- Simplified HUD: Key stats like the total plane count and system status are tucked away in non-intrusive floating widgets, keeping the view clean.
This UI is built using standard web technologies and fetches the aircraft.json data mentioned above every few seconds, rendering the aircraft on a Leaflet map.
Network Engineering Aspects
This project turned into a great example of practical network engineering in a small home lab environment.
Segregation of Duties
The radio decoding function and the web serving function are on separate devices. This reduces load on the SDR host and makes the architecture easier to scale or troubleshoot. If the web server goes down, the radio keeps recording; if the radio needs a reboot, the website stays up and just shows a "signal lost" state.
Security & Resilience
Using a Pi 4 as a reverse proxy allows me to expose a single, secure endpoint (samnet.dev/radar) while keeping backend services on a private network.
- NAT & Firewall: The reverse proxy sits behind my home router. I use tight firewall rules and selective port forwarding to ensure only port 443 is exposed.
- Resilience: Keeping the data local lowers external dependencies. If the front-end decoder hiccups, the UI falls back to a simulated view so visitors still get a usable experience.
Advanced View: tar1090
While the primary dashboard at samnet.dev/radar offers a streamlined "customer UI" experience, I also maintain access to the full raw interface for power users.
If you are an aviation enthusiast or a data nerd who wants the full suite of tools—including advanced filtering, detailed aircraft tables, and historical flight tracks—you can access the tar1090 interface directly at samnet.dev/radar/raw. This view exposes everything the receiver is seeing without any simplification.
What I Learned
Building SamNet Radar reinforced a few key engineering principles:
- Local decoding is private: Running the RTL-SDR locally yields low latency and keeps raw RF data under my control.
- Physical setup is king: Antenna placement and low-loss coax yield larger improvements than any software tweak.
- Separation of concerns: Splitting decoding and serving simplifies operations and maintenance.
- UX matters: A small number of well-designed controls makes the project useful to both technical and non-technical visitors.
Want to dig deeper?
You can check out the live project at samnet.dev/radar.
This project is a compact mix of RF, embedded Linux, and practical networking. It's a great weekend project if you want to learn more about radio signals and how to safely expose local services on the web.